As I'm sure you are well aware of, I am going to college at UNT, and am staying in the dorms on campus. Now as great as my headphones are, I still like to listen to music through speakers every once in a while, and the speakers on my laptop don't cut it by a long shot. Because of this, I decided to bring my stereo up from home: the wonderful, magical, beautiful Marantz 2230.
 |
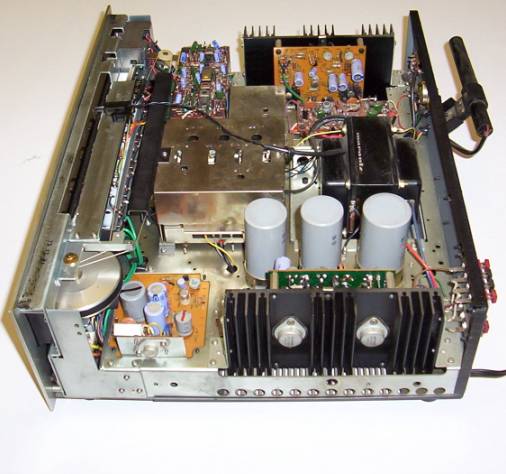
| The legendary Marantz 2230. |
 |
| Look at those big, beautiful preamps attached to the heatsinks! |
It may be from the 70's, and it may weigh over 30 lbs, but it sounds fantastic! Anyways, it worked great for the first semester and about half of the second, but then I noticed that something weird was happening: the left channel was getting quieter and quieter. I could compensate by adjusting the balance for a while, but the white noise due to turning it up so loud to compensate for the imbalance finally got so unbearable that I had to use headphones plugged directly into the computer for the rest of the semester. Finally, a few weeks ago, my dad and I decided that it was time to fix it. The first step was isolating the problem: we began by narrowing it down to the preamps, which made sense, as there was one for each channel.
Luckily, we had not only the user manual (which actually came with a schematic), but also the service manual, which had schematics for each section as well as different values the components should read. We narrowed down the problem even more, figuring out which transistor made the left channel so much quieter than the right one. We started by replacing that transistor. No dice. We replaced a couple of capacitors, still nothing. Luckily, I remembered that we had another Marantz above the office more or less for parts, so I went up and brought it back down. We decided to just go ahead and replace the entire preamp, since by this time we were tired of troubleshooting. We cut the preamp loose, and proceeded to replace the preamp. My dad had been lamenting the length (or lack thereof) of the wire when trying to probe the preamp, so we decided to make sure there would be the perfect amount of wire to lay flat while working. After spending quite some time on that, we plugged the stereo back in and checked the signals. Same thing: the left channel was way quieter. We did find it fairly odd that both preamps had the same problem, but the parts unit had been above the office for so long that we had no idea what kind of condition it was in. We decided to cut the other preamp free from the parts unit to test, and this time use clip leads to connect them instead of soldering before testing. We hooked all the wires up, and it had the same problem! By this time, we began to suspect that maybe the left channel preamp wasn't the problem. We then decided to do what we should have done at the beginning: bring out the other Marantz 2230 we had (and knew worked), and compare the levels. As I'm sure you have figured out by now, the left channel was the correct volume, and the right channel was too loud! Once we
finally figured that out, it was a relatively quick fix of replacing the right channel preamp. We got it put back together, and I now have a beautiful and fantastic sounding stereo to bring to college in a few weeks.
What I Would Do Differently
CLIP LEADS CLIP LEADS CLIP LEADS!!! Never again will I solder something like that again without first testing it with clip leads. I also would probably compare it with a known source if possible. Because it was important to compare known amplitudes, we used a function generator with the leads precariously clipped onto a headphone jack-to-stereo RCA cable. If I ever have to do something like this again, I definitely plan on making a BNC-to-stereo RCA cable; it would make the entire process much easier.
Edit: When I said we replaced the preamp, I was actually mistaken. What we actually replaced was the entire preamp and power module. 
No comments:
Post a Comment